July 1, 2018
Disclaimer: I made these instructions while using Wwise 2017.2.4. I haven't tried the latest 2018 updates, so I don't yet know how Ambisonic playback works there.
Audio middleware Wwise is a bit tricky when it comes to setting up for Ambisonic content. For my latest project I had to spend quite some time testing and and searching for help on the Internet until I managed to get Ambisonic files to play correctly.
Audiokinetic's own online manual for Wwise doesn't provide much help around the topic, but luckily I found one post in their Wwise forum that unlocked the problem. To make it easier to set up everything for the next time I made these instructions for me. Hopefully they are useful for you, too.
How to get Ambisonic files to play correctly in Wwise and Unity
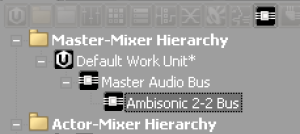
1. Create a new bus under the Master Audio Bus. Name it something like Ambisonic Bus. I named it Ambisonic 2-2 Bus as my files were in 2nd order ambisonics.
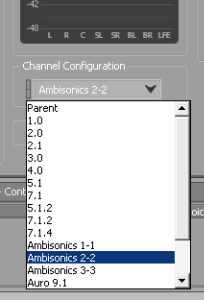
2. Set its Channel Configuration to Ambisonic 1-1, 2-2 or 3-3 depending on your need. I chose Ambisonic 2-2 (2nd order).
3. Open Effects tab and insert a spatialiser plugin for HRTF/binaural modelling for heaphones (unless your audio output is a speaker setup). I have tested several plugins, e.g. Auro-Headphones by Auro-3D, which is integrated into Wwise and easy to use, but as with most of the spatialisers doesn't sound too convincing. Previously I used Google Resonance, which is free but needs some trickery to get installed correctly, especially with Mac. There is also Microsoft HRTF plugin, also free, but for some reason I've never got it working. I don't know if Steam has already released their Wwise plugin, but it should be coming. What I'm really looking forward is dearVR releasing their spatialiser for Wwise. They have already started a beta programme with Fmod, so hopefully Wwise version will be reality soon.
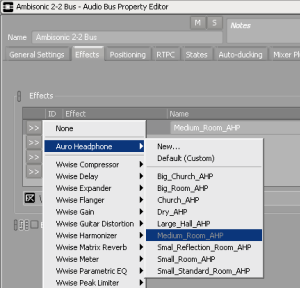
To install e.g. Auro Headphones you have to obtain a license (students can get a free license if the school participates Wwise's academic programme). Then you have to register your Wwise project via Wwise Launcher or Audiokinetic's website. Once that's done and you've received your license, you need to open File → License Manager and paste the license there.If you're using Auro Heaphone you might also want to import presets by going to File → Import Factory Assets and choosing Auro Heaphone Presets.
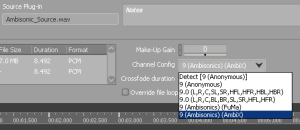
4. Next, import the ambisonic audio file normally. Open it in Source Editor and manually change Channel Configuration to
"Ambisonics" and either "AmbiX" or "FuMa" depending on your channel order. If you leave the selection to "Detect" it
won't work.
5. Go to the source sound's General Settings → Output Bus. Use the Ambisonic Bus you created as the Output Bus.
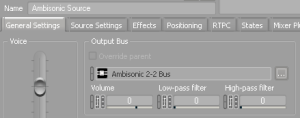
6. Go to Positioning and choose "Enable Positioning 3D".
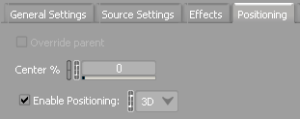
7. In the same window go to Attenuation and create a custom Attenuation setting (I called it "Ambisonics"). Click "Edit"...
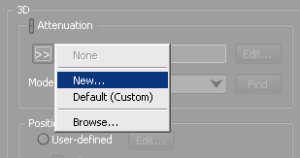
...change Spread curve to "Custom"...
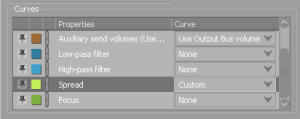
...and edit the curve so that it's 100% across all distances. Otherwise the Ambisonic file won't play correctly.

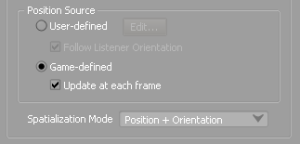
This it the important piece of advice from Wwise user forum I would not have figured out by myself. Thank you! (Don't understand why Audiokinetic doesn't provide that information...) Check that "Position Source" is set to "Game-defined" and "Spatialization Mode" to "Position + Orientation".
Now the Ambisonic file should work properly and stay fixed in its position. Hope it works for you!